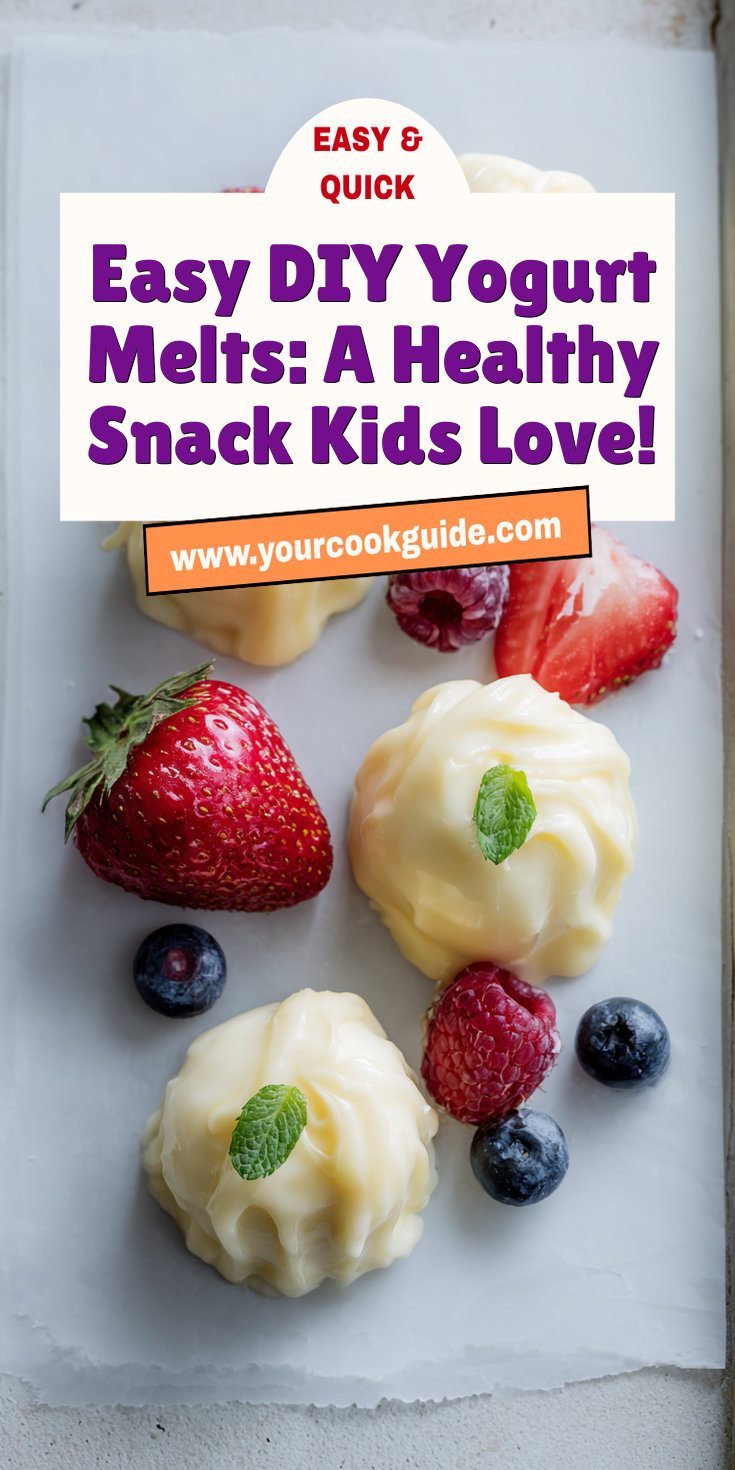
Give it up, my sweet friend! You cannot resist the temptation of these DIY Yogurt Melts.
Come to Mama! I am literally obsessed with this recipe. It’s a game-changer for snack time, just like our popular Homemade Yogurt Melts recipe.
We’re talking about little clouds of creamy, tangy yogurt that melt in your mouth. They are pure magic.
And the best part? You know exactly what’s in them. No weird additives, just simple, happy ingredients.
If you need a healthy snack that’s also a total crowd-pleaser, you’ve hit the jackpot. Let’s do this!
Recipe Overview
- Cuisine: N/A (Homemade Snack)
- Category: Snack
- Prep Time: 10 minutes
- Cook Time: 2-3 hours (dehydrating/freezing)
- Total Time: 2-3 hours+
- Servings: Makes about 60-80 melts
Do You Love This Recipe Too?
I have a confession. I first made these for my niece, a super picky toddler.
DIY Yogurt Melts Recipe
Let’s Get Your Ingredients Ready
Bringing This Recipe to Life (Step-by-Step)
Notes
Enjoy your homemade DIY Yogurt Melts Recipe!
She would turn her nose up at everything. I was determined to find a win.
When I handed her a bowl of these colorful little dots, she devoured them. I mean, she asked for more!
That moment of victory hooked me for life. Now, I always have a batch in my freezer.
I snack on them, my friends snack on them, they are perfect for everyone. The joy is real!
My Shopping List for This Recipe
I get so excited for this tiny, powerful shopping trip. You only need two key things!
It’s all about quality here. The better your yogurt, the more amazing your melts will taste. If you’re looking for another fantastic way to use that yogurt, you have to try this easy yogurt toast.
Let’s Get Your Ingredients Ready
Gather your stars! This is the easiest mise en place you’ll ever do.
- 2 cups of thick, plain yogurt (Greek yogurt or Skyr are PERFECT here)
- 1-2 tablespoons of pure maple syrup, honey (for over 1 year), or fruit puree (optional, for sweetness)
- That’s it! See? I told you it was simple.
Bringing This Recipe to Life (Step-by-Step)
Put on some fun music! We’re about to create snack-time magic in just a few steps.
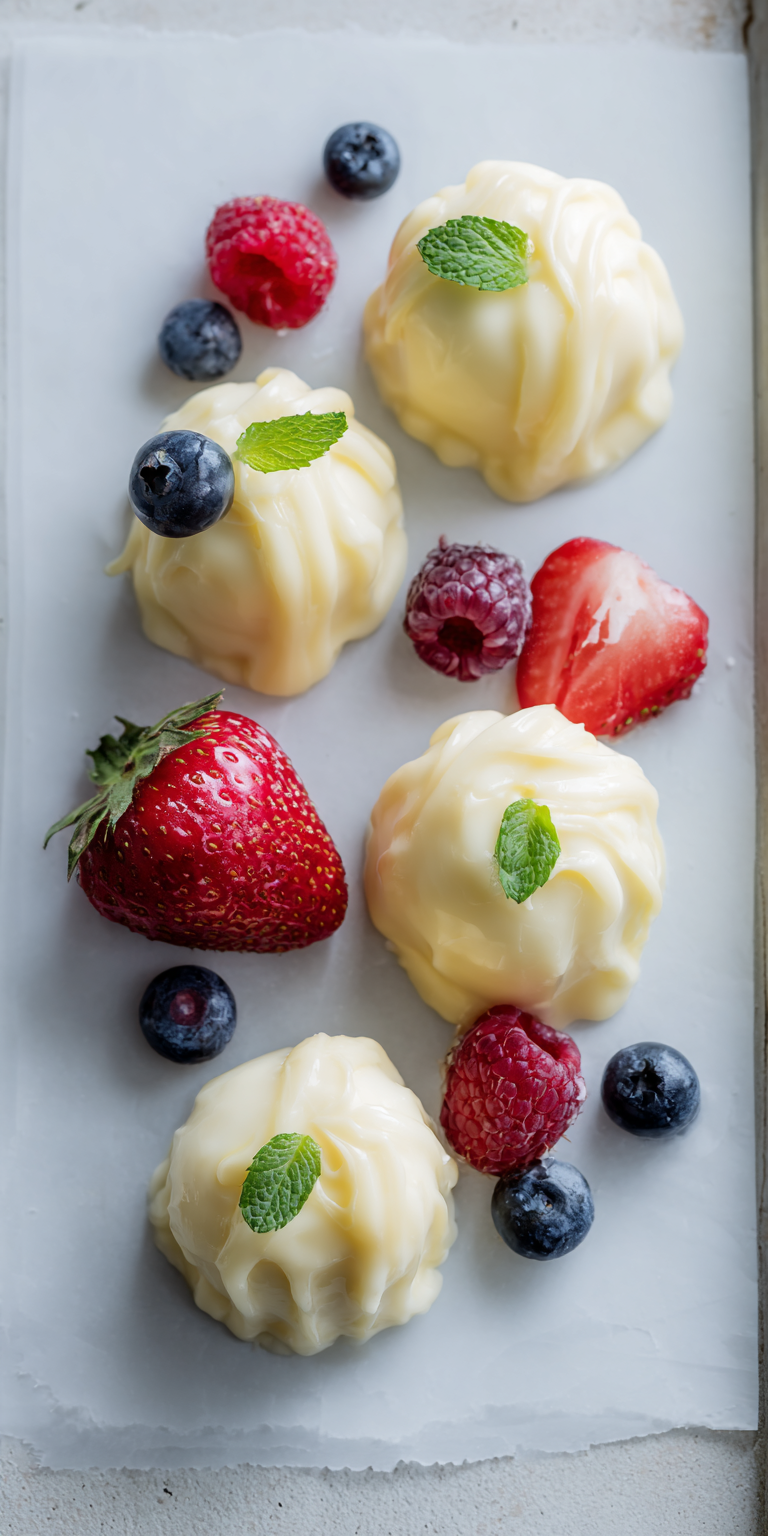
- Line a large baking sheet with parchment paper or a silicone baking mat. This is non-negotiable for easy peeling later!
- In a bowl, mix your thick yogurt with your chosen sweetener, if using. Give it a good stir until it’s smooth and lovely.
- Now, transfer your yogurt mix to a piping bag or a small zip-top bag. Snip a very tiny corner off the bag. We want small dots!
- Pipe little dots (about the size of a dime) onto your prepared baking sheet. Leave a little space between them.
- Here’s your choice: The Freezer Method OR The Dehydrator Method!
Freezer Method (Easiest!): Pop the tray straight into the freezer for 2-3 hours, or until rock solid.
Dehydrator Method: Place the tray in a dehydrator at 135°F (57°C) for about 3-4 hours. They’ll be dry on the outside, slightly chewy inside. - Once they’re fully set, peel them off the parchment paper. Immediately store them in a freezer bag or airtight container.
Fun Variations to Try Next Time
Got the basic recipe down? Amazing! Now let’s play and make them even more fun.
Mix in a spoonful of fruit puree like strawberry, mango, or blueberry before piping. Hello, color and flavor! For a fruity frozen bite with a similar vibe, check out our strawberry yogurt bites.
A tiny drop of vanilla extract or a sprinkle of cinnamon can add a warm, cozy twist.
For a protein boost, mix in a scoop of your favorite plain or vanilla protein powder. Just add a splash of milk if it gets too thick.
How to Store, Freeze, and Reheat
This is the best part! These little guys are made for the freezer.
You must store them in the freezer in an airtight container or bag. They will last for up to 2 months!
There’s no need to reheat. Just grab a handful straight from the freezer and enjoy the cool, creamy melt.
If they stick together, just give the bag a little tap on the counter. They’ll separate easily.
NUTRITION INFORMATION
- Serving Size: About 10 melts
- Calories: ~50
- Protein: ~5g
- Fat: ~0-2g
- Carbohydrates: ~5g
- Sugar: ~3g (varies with add-ins)
A Quick Q&A on This Recipe
Can I use regular, thin yogurt?
I don’t recommend it, friend! Thin yogurt will spread into a puddle. You need that thick, strained yogurt for perfect little dots. It’s the secret weapon.
Are these good for school snacks?
YES! Pack them in a small insulated lunch box with a freezer pack. They’ll stay cold and be a delicious, healthy treat by lunchtime. A total lunchbox win!
My toddler is under one. Can they have these?
Absolutely! Just skip the honey. Use a fruit puree for natural sweetness or leave it out entirely. They are a fantastic, dissolvable finger food for babies.
I am telling you, these DIY Yogurt Melts will change your snack game forever. They are that good.
They are proof that the simplest recipes, made with love, are always the best. You’ve got to try them.
I am literally waiting by my computer to see your creations! I can’t wait to hear how yours turns out! Please leave a comment and a rating below to let me know what you think!